ShockTek to Bilstien Conversion
Once upon a time, there was a company named ShockTek, who made custom shocks based on (primarily) Bilstein components.
But for one reason or another - and there's no shortage of rumours - ShockTek vanished without warning, leaving everybody who had ShockTek shocks (including yours truly) holding the bag.
(It's really a shame, as Dr. Mike (the owner of ShockTek) was great to work with, kept every single one of his promises he ever made to me, and was passionate about improving his product and his service. We miss you Mike.)
Anyway, while ShockTeks were based on Bilsteins, enough bits of them were not Bilstein for Bilstein to consider them "not Bilstein", and so there was no place to get them serviced.
If you want something done right, you do it yourself - so here is how to convert a ShockTek to a "real Bilstein"
Pretty much the same procedure can be used to convert a standard, off-the-shelf Bilstein into a "take-apart", just like their NASCAR shock line. That opens up the entire Bilstein NASCAR parts catalogue to you, and makes a shock rebuild/revalve into a job that can be done in a few minutes trackside - messy, but doable.
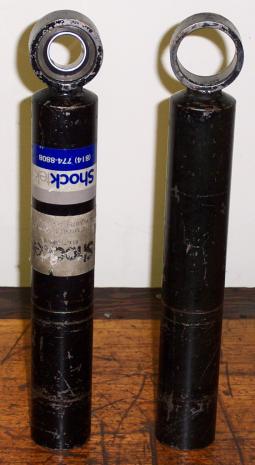
Here's a shot of a typical ShockTek shock body after a couple of seasons of use. I'll say this for the ShockTeks though, people were certainly using them. Every set I've seen to date have been heavily used.
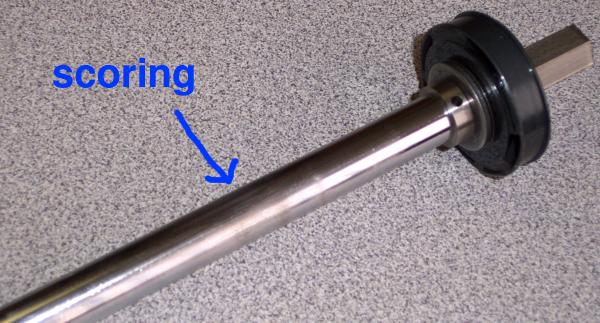
Here is one of the biggest problems with ShockTeks. ShockTek was manufacturing custom shafts with their own design rebound adjuster in it. During the latter part of the company's life, quality control seems to have slipped somewhat, and either the chrome plating or the heat treat on the shafts (or both) was substandard. The result is heavily scored shafts right where the shaft enters the seal, and seal failure follows shortly thereafter. Result: leaky shock. It's hard to see on this photo, but this shaft (from my right rear) is badly scored.
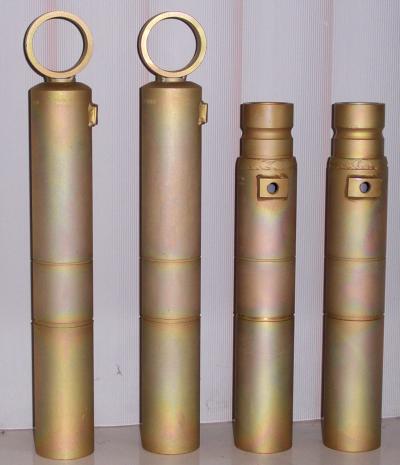
My shocks, sandblasted and cad plated, ready for the replacement shaft and piston.
While we were at it, we cut new snap ring grooves into the shock to move the spring perch collar into a better place.
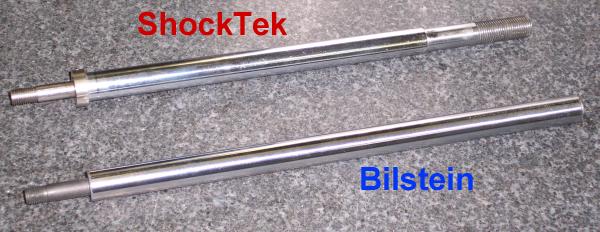
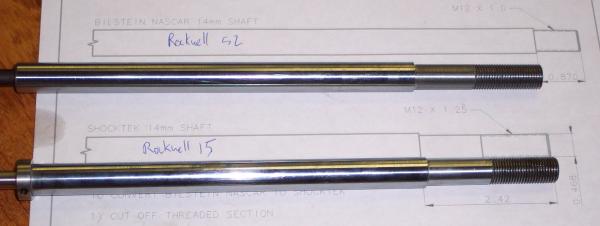
A comparison of the ShockTek shafts to the Bilstein NASCAR shafts. Besides not being adjustable (and so not being gundrilled for the adjusters) the Bilstein NASCAR shafts are a little bit longer and are threaded M12 X 1 on the end, instead of M12 X 1.25 like the ShockTek shafts. The ShockTeks also have a turned-down step on them to locate the upper spring perch.
To convert a Bilstein rod (part #421251) to a ShockTek rod thus involves cutting off the extra length, turning down the shaft, and threading the end. In this picture, the Bilstein shafts have already been cut to length.
This was only necessary to fit the shock into the existing ShockTek upper mount. A far better way to handle it (and what I did on subsequent conversions) was to create new bearing adaptor standoffs to fit the standard Bilstein shaft.
All finished. There turned out to be another big difference between the two shafts - the Bilstein tested out at Rockwell 52, whereas the ShockTeks were Rockwell 15, a good deal softer. No wonder they were scoring! The extra hardness on the Bilstein parts added a little excitement to the machining, but it turned out to be a case-hardened layer about 50 thou deep, so the threading operation went OK.
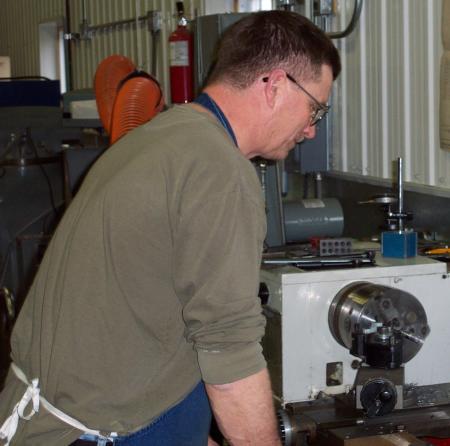
This is Fred Passa, who provided the machine shop and did a bunch of the work too. Thanks Fred!
We're not only changing the shafts to correct for poor materials, we're also changing the valving to better match the car. But in order to do that, we need the ability to run the shocks on a shock dyno. Shock dynos are set up for standard eye-to-eye shocks on 1/2" diameter pins, and the DSM shocks are set up to fit a standard DSM - which doesn't use a 1/2" eye mount. So we have to fabricate adaptors.
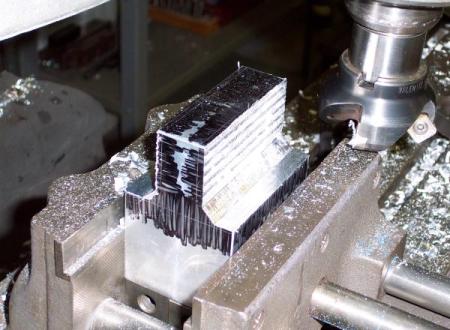
This gives me an opportunity to make a lot of aluminum chips on Fred's Bridgeport. Here the lower front adaptor is roughed in.
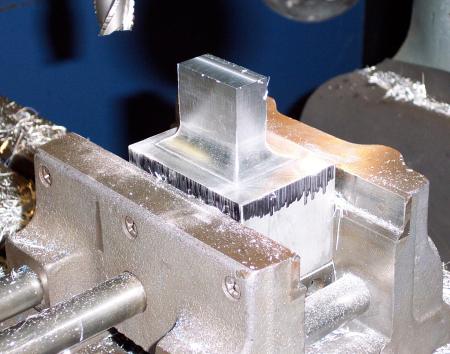
And here's the same part, a little bit more finished.
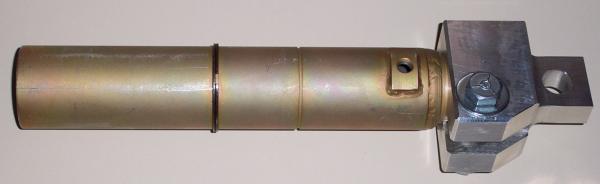
Almost done. All that's left is the fitment of the spherical bearing (in the hole in the tab to the right) which is just waiting on the delivery of the bearing itself. The fitment of the shock tube to the adaptor is PERFECT - just a little bit of tightening down locks it solid in place.
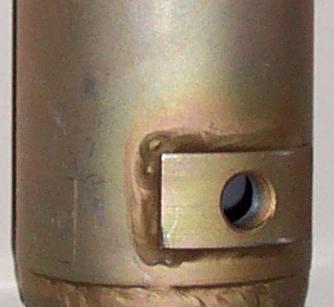
This is a close-up view of an important part of a ShockTek to Bilstein conversion.
In order to convert a ShockTek to a take-apart Bilstein, you need to breach the nitrogen compartment (below the separator piston) and fit a high-pressure Schrader valve (Bilstein part #191001, currently $2.85 from Bilstein)
Do this:
- Drill a small hole about 1/4" from the base of the shock into the nitrogen compartment. This WILL vent any nitrogen pressure, so be prepared for the release - if it spits oil too, you have a problem with the separator piston seal.
- Disassemble the shock and sandblast the OUTSIDE of the tube.
- Cut a 1/8" thick piece of mild steel, roughly 5/8" X 1", and bend it to a 25mm radius.
- TIG weld it to the shock body, covering the hole you drilled earlier.
- Drill and tap the tab (through the shock body) to match the Schrader valve.
- Paint or powder coat or cadmium plate the shock tube.
Presto! You now have a take-apart Bilstein.
This is a close-up of how the shimstack goes together. The various sizes and thicknesses of the valve plates determine when the plates "blow off", and how far they open, which in turn determines the force/velocity curve of the shock. The plates with the notches in them are the low speed bleed plates - the more notches, the more bleed at low speed, the less low-speed force.
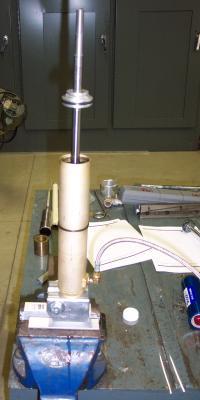
An essential step in building the shock - bleeding the piston. You have to pump the piston up and down until no more air bubbles escape from the piston. Depending on how much force your valvestack is supposed to provide, this can be a real bitch.
A way to speed it up is to fabricate a plexiglass plate with a rubber gasket and a bung for a vacuum pump on it. Before bleeding the piston, apply vacuum to the oil-filled shock body - it is amazing how much air you can extract this way, hand how much it speeds up bleeding (this is a Joe Stimola trick)
Note that the upper seal and support is on the rod already - this is important. The Bilstein seal goes on from BELOW, meaning that you have to put the seal on the rod BEFORE the piston. This isn't mentioned in the Bilstein manual... because, as it turns out, it isn't true. There's an adaptor tool from Bilstein that lets you install the seal from above without damaging it.
If you look closely, you'll see that our setup isn't 100% pure Bilstein. We're running Fox canisters, making these shocks compression-adjustable. This is one of the nifty side-effects of the Bilstein conversion: the thread for the remote line is the same thread as the Schrader valve. Remove the separator piston, attach your canister of choice, and you've got a remote-reservoir shock!
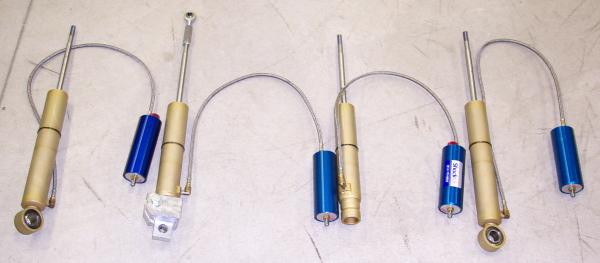
All done! Note the shock second from the left - it has the completed dyno adaptors on it. Having access to Varicad and Fred's machine shop made this a whole lot easier than I expected.
Now they just have to get dynoed.
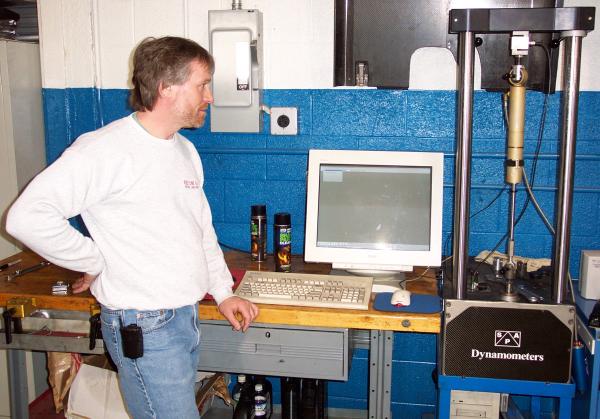
A highly trained shock technician running a shock on the dyno. We dynoed the converted shocks and a set of unconverted, single-adjustable ShockTeks.
An example of what we discovered. Forces and velocities deleted to protect the innocent.
The Bilstein trace shows the extremes of the compression adjuster. The ShockTek trace shows full hard, 1.5 turns out (our usual setting) and full soft.
Interesting stuff to see here:
- The compression adjuster on the canister leaves the rebound values pretty much untouched.
- The rebound adjuster on the ShockTek has a HUGE range of adjustment, and is pretty much a textbook example of bleed. There's a little bit of crosstalk on the adjuster, but not much.
- The ShockTek has an enormous amount of nose force.
We're really, really happy with how this all worked out. The rebound force is EXACTLY along the design curve we wanted. The bump side is a little bit higher than we wanted (it appears the forces from the canister adjuster are additive to the forces from the piston stack) but we're still much better off than we were last year. The Bilsteins are very closely matched side to side - they really are excellent shocks.
As far as the ShockTeks are concerned, they turned out to be really good shocks as well - they just have a few bugs in them, that had ShockTek stayed in business, undoubtedly would have gotten fixed with further development. If you have ShockTeks, here are the problems you are likely to have:
- Dr. Mike was making his own parts - shafts and the adjuster mechanism. The needle bleed valve he used is very effective, but is also exceptionally sensitive to the shape of the needle. The slightest variation in needle profile, or a tool mark or a nick, will totally change the flow through the jet. This gives you an adjuster with lots of range, but the variation shock-to-shock was pretty high. This makes setting an axle-pair of shocks to the same forces a bit of a challenge.
- The shafts were not hardened like the Bilstein shafts are, making them susceptible to corrosion and scoring.
- It looks like the upper shaft seal is designed to go on the shaft from below, but the ShockTek shafts have a machined step in them where the bleed hole is that is larger than the seal - meaning that they have to go on backwards. The process of forcing the seal on the wrong way tends to chew it up pretty badly. Couple that to the soft shafts, and you've got a recipe for a leaky shock.
- The forces produced are in many cases sub-optimal. This is, however, just a calibration error, not a design flaw, and is easily fixed.
The fine folks at Bilstein have read this page, and have asked me to place up the following information:
- While Bilstein will happily sell you all the parts to carry out this conversion, they do not officially support or endorse it - proceed at your own risk.
- Bilstein will not carry out this conversion for you, nor will they provide any servicing on these shocks once converted. They're a bit of a Frankenstein's Monster, not an official Bilstein product.
- If you decide to add a remote reservoir to a non-remote reservoir shock (by connecting the line to the Schrader valve port) don't forget to remove the separator piston - it's in the canister now.
- With either the Schrader valve installed in the body of the shock, or with a remote reservoir, check gas pressure before every race to ensure the pressure hasn't leaked down.
- Gas pressure can be used as a tuning tool.
- This conversion is an advanced technique for technically capable users only, not the general public. Proceed at your own risk.
- Be sure of the legality of shock modification in your sanctioning body's rules before attempting this.
- The oil volumes listed in the Bilstein rebuild manual (part #MST-194000) may not apply to the ShockTeks, as ShockTek often shortened shock bodies. A certain amount of trial and error will be required to determine the proper oil volume on non-remote-reservoir shocks. Too much oil may cause the separator piston to cross the plane of the Schrader valve or suck-in of the piston rod; too little may result in contact between the valve piston and the separator piston. Shoot for 7-10mm of rod stick-out on a fully-compressed, fully-pressurized shock.
Bilstein have been very helpful in developing this conversion process and are keen to see people using their product (even Frankensteined like this) do well. But they want to be clear that this procedure is not an officially endorsed Bilstein procedure.
2010 Update: This process paved the way for a long slate of Bilsteins converted to take-aparts. Any off the shelf Bilstein shock can be so converted, and I built hundreds of them for a lot of very satisfied customers.
I am very pro-Bilstein and pro-Bilstein customer service. Thanks guys!
